Create A Photography Portfolio In WordPress
Difficulty Level: Beginner
In this guide we will be using our hosting platform BreezeLabs Hosting.
All first time customers can get their first month of hosting for free with code “BREEZE22”.
What we will create
In this guide we are going to be creating a photography portfolio, photo album, using WordPress. In our example we will be creating a portfolio of dog pictures. You can view this example website at doggos.breezelabshosting.co.uk.
Step 1: Purchase a hosting plan
For this site, any hosting plan will do. The only limitation you need to consider is the storage needed.


Step 2: Register your domain and set up your DNS
Once you have purchased a plan, you can select “Click To Manage Plan” which will take you to your plan management page. On this page you will be able to view detailed information about your plan, website and DNS.
To set or create your domain, click “Set Domain Name” under the “DNS” section. From there, you can either use your domain name, follow section A, or create a free subdomain, follow section B, from our list of BreezeLabs Hosting domain names.
A. Use your own domain:
Make sure “Use your own domain name” is selected. You can then enter your domain name into the input box below.

Click “Add Domain Name” and then you will be able to see your Name Servers in the “DNS” section, this may take a second.

Enter your Name Servers on your domain name registrar’s DNS Name Servers section. Make sure to copy exactly what is shown in your “DNS” section as this is specific to your site. Your domain name registrar should have plenty of information on how to do this. If you need assistance, don’t hesitate to reach out to our support team on the help page.
Your Name Servers can take up to 48 hours to update, however it is usually a lot quicker. Once they have updated you should be able to see a BreezeLabs Hosting parking page, or a website if you have gone ahead and installed one, if you go to your domain on a web browser.
Your domain name should be SSL certified shortly after it becomes visible, within the next hour. You can check your SSL status under the DNS section. Your site may act unexpectedly until it is certified.
B. Use a free BreezeLabs Hosting subdomain:
Make sure “Create a free breezelabshosting domain name” is selected. You can then enter desired subdomain name into the input box below. Make sure to select the full domain type you want (we will be adding more domains for you to create subdomains with soon). If the subdomain is taken try a different full domain or different subdomain.
In our example we enter the subdomain “doggos” and select the “.breezelabshosting.co.uk” full domain to create a domain name of “doggos.breezelabshosting.co.uk”.

Click “Add Domain Name” and your new subdomain will be created on your plan, this may take a second.
As you are using one of BreezeLabs Hosting’s subdomains, you do not need to worry about any more DNS settings.
Your new subdomain should now be visible within the next hour, however it is usually a lot quicker. Once visible, you should be able to see a BreezeLabs Hosting parking page, or a website if you have gone ahead and installed one, if you go to your domain on a web browser.
Your domain name should be SSL certified shortly after it becomes visible, within the next hour. You can check your SSL status under the DNS section. Your site may act unexpectedly until it is certified.
Step 3: Install WordPress
This is, without a doubt, the easiest step. Simply click “Install” on “WordPress” under the “Website Installer section” towards the bottom of the page.

Step 4: Create your websites admin account
Either click on the “WordPress admin pannel” link in your “Website Details” section or go to your domain + “/wp-admin”. In our example we go to “doggos.breezelabshosting.co.uk/wp-admin”.
You should then see a language selection panel. Select your preferred language.

Fill out the Information needed to set up your WordPress Site and Admin Account. Make sure you choose a strong password and keep this secure. We recommend leaving “Discourage search engines from indexing this site” unchecked if for most cases. Check out our example, certain boxes are blanked out for obvious reasons.

You can then click “Log In” or go to your admin link again. In our example this was “doggos.breezelabshosting.co.uk/wp-admin”.
Step 5: Install a theme
A theme specifies gives you a template of how your site should roughly look while giving you the opportunity to easily customize there look to your desire. Their are countless themes out there, both paid and free, however most people will be able to use WordPress without ever spending any money on themes or plugins.
You can install themes through the theme library or by uploading one. For this example we will be getting one from the library. To upload one you can simply click “Upload Theme” on the Appearance Add Now button.
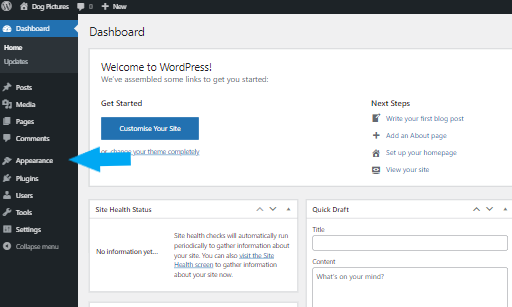


You then need to activate the theme. This can be done two ways:
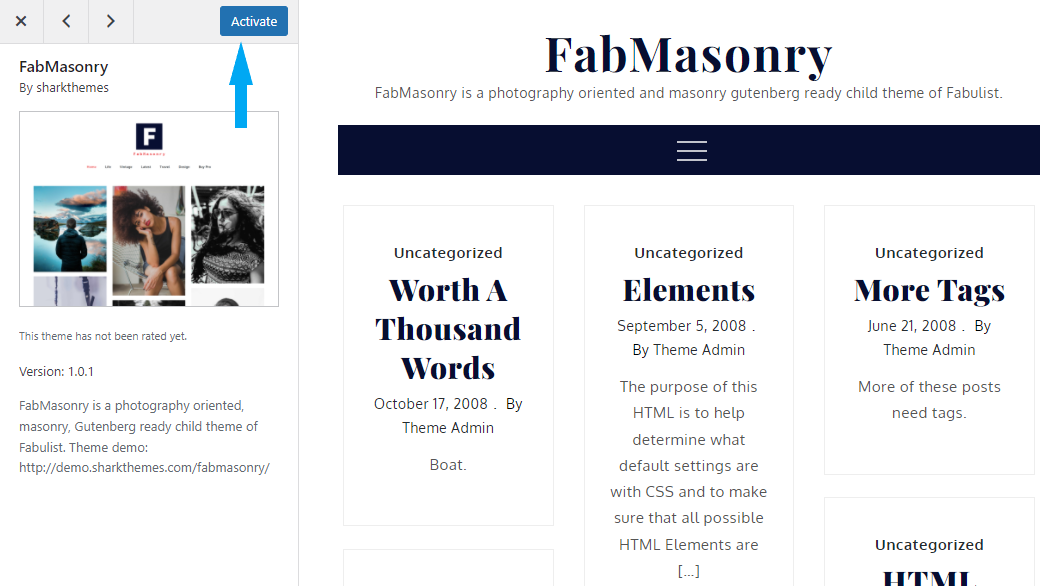

Step 5: Customizing the theme
Click “Customize” in the Appearance tab. This will take you to a page that shows you the customization parts of the theme.

There are a few essentials that need to be changed in the theme customisation page:
- Site Identity -> Logo
- Site Identity -> Tagline
- Site Identity -> Site Icon
There are some less essential customization options that allow you to make the site truly yours:
- Colours -> Header Text Colour
- Colours -> Background Colour
- Background Image -> Background Image
- Header Image
- Theme Options -> Footer Section -> Copyright Text
This is how we customised our site.
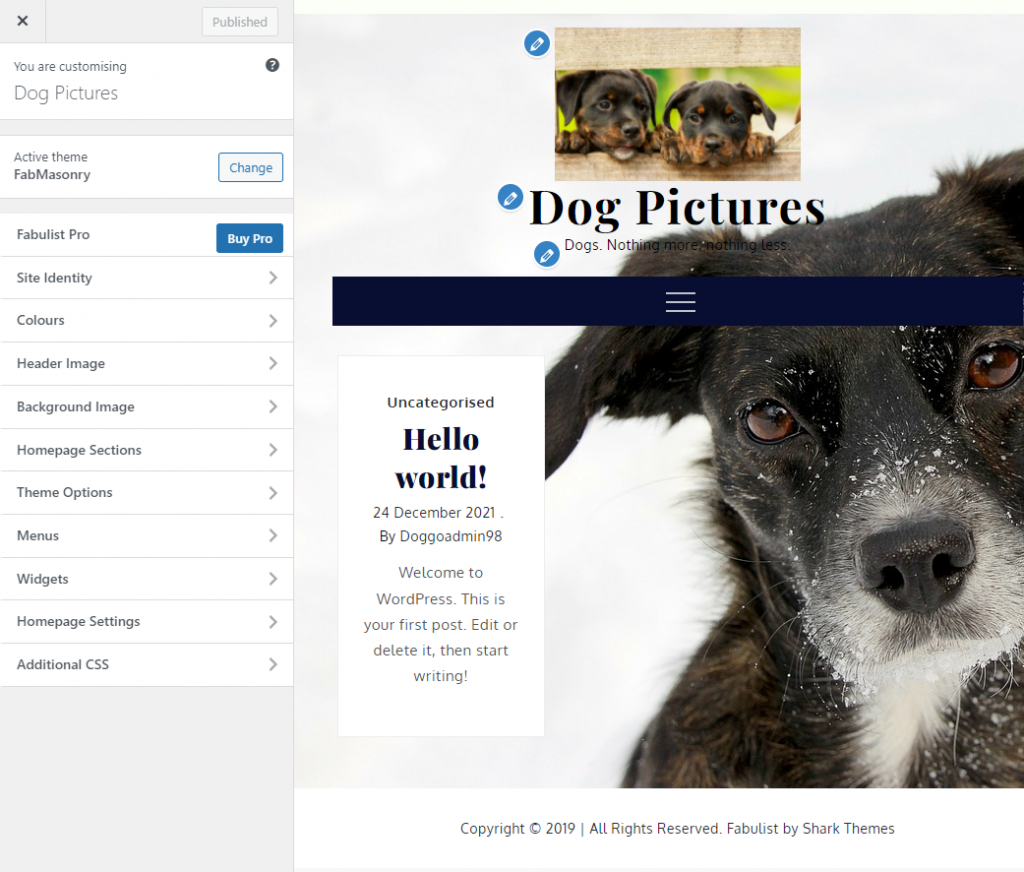
We can add a menu to enable to enable us to have viewable pages such as an “about” page:
- Click “Menus”.
- Click “Create New Menu”.
- Select “Primary Menu” under “Menu Location”.
- Give your menu a name and then click “Next”. This isn’t seen publicly.
- Click “Add Items”.
- We will add the home page by clicking the plus symbol.
- We will then add an about page by entering “About” into the input labelled “Add New Page” and then click the “Add” button.
This is how our menu now looks.
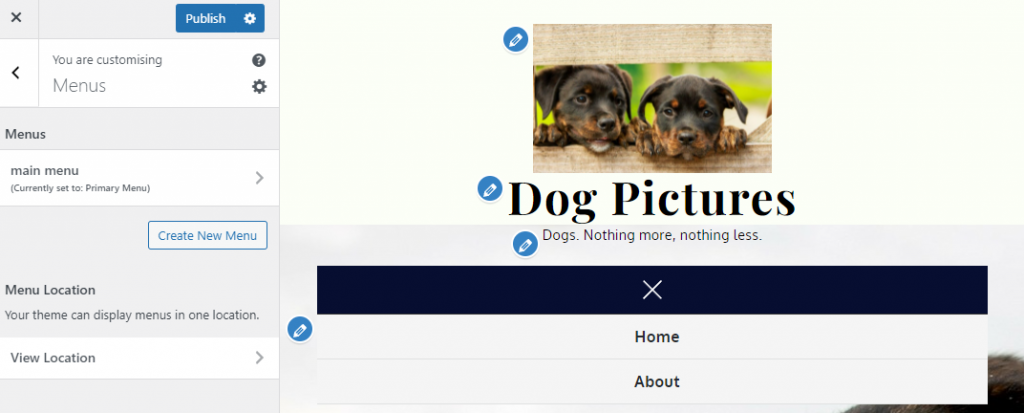
After you’ve finished customizing click “Publish”.
Step 6: Customise the About page.



4. Navigate to the about page to view your first page.
Step 7: Add some pictures
We add pictures within the post section. If youve been looking carefully, youll notice that our homepage already has a post saying “Hello World”. Lets start by navigating to posts to delete this post.


Finally, we can start to add our pictures. This is done by:


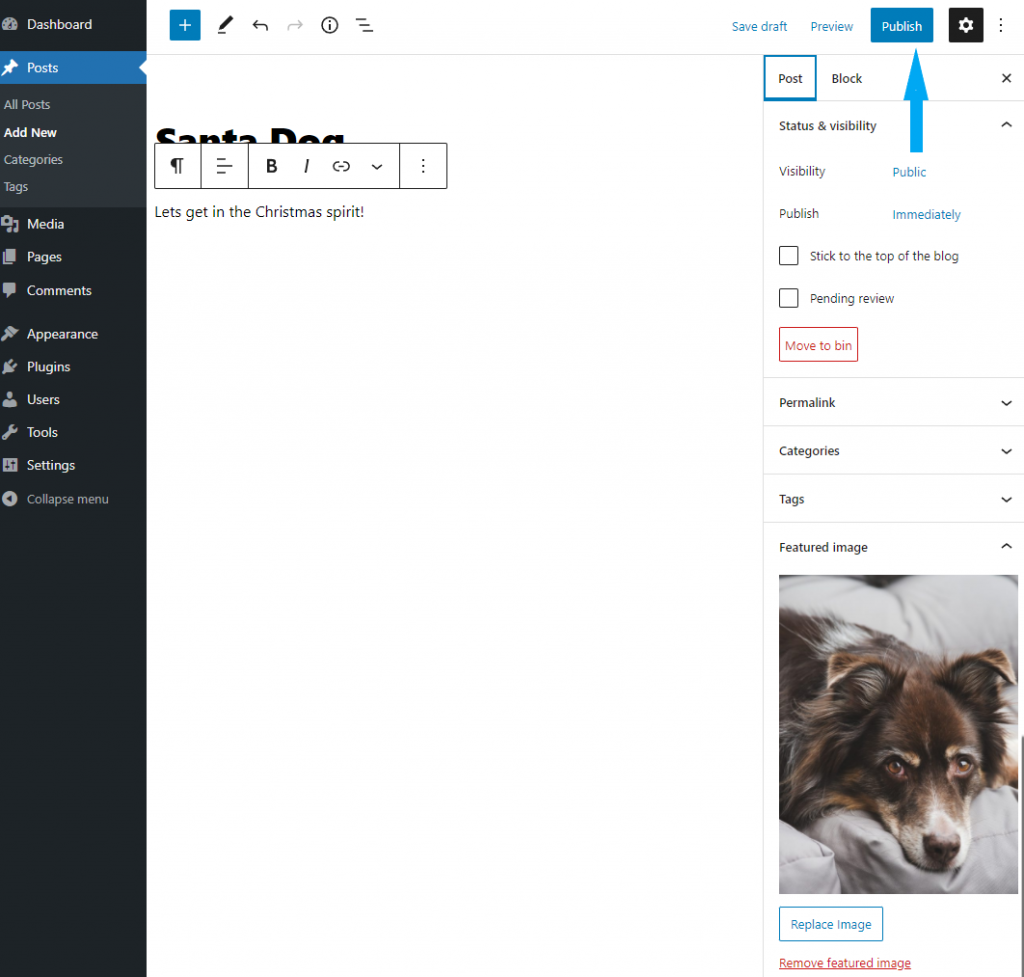

6. This is what the website looks like now. If you hover over the image you can view details and if you click it then it will take you to that pictures page to display more information.
Finally. lets add some more images and look at the final result.
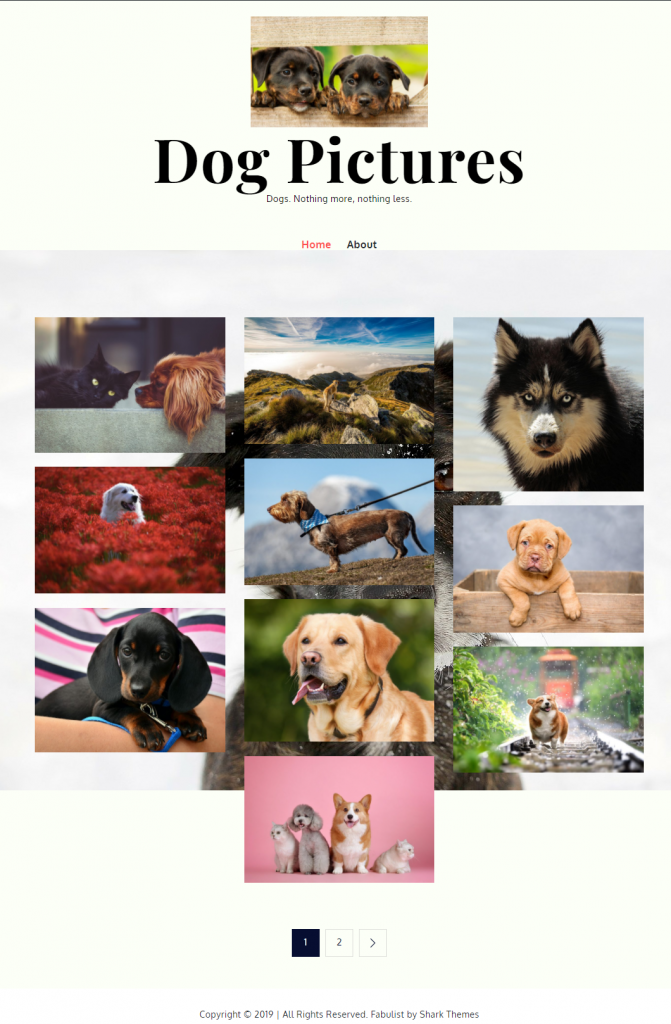
Congratulations! You’ve just created a photography portfolio in WordPress.
In the future you can customise it more and enhance its functionality with more pages, more posts, categorising the posts to allow people to search your site through categories and so much more!

